Introduction: Stop Posting Manually, Start Automating
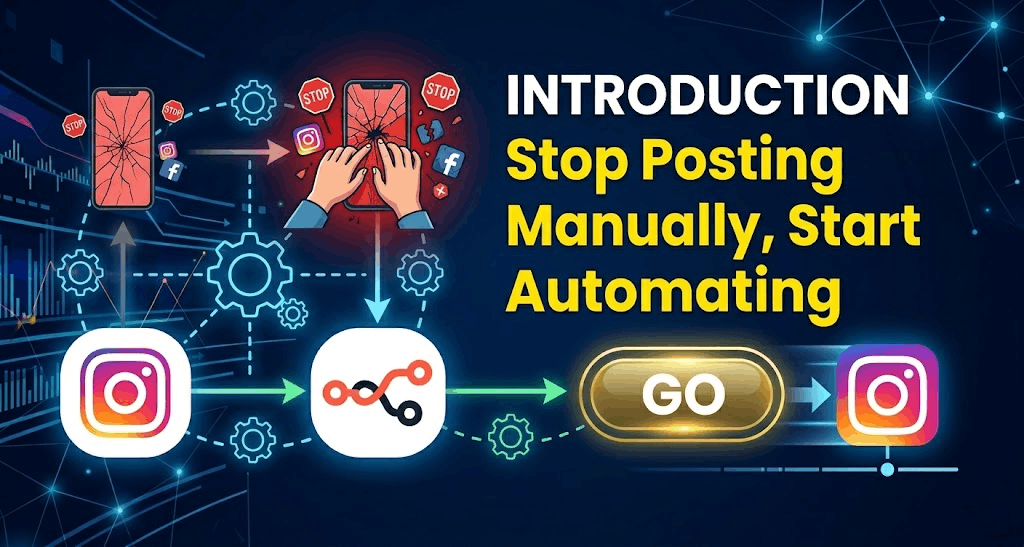
Imagine planning your Instagram content for an entire month while sitting at your desk, and then letting the robots handle the rest while you sleep. Sounds like a dream? It’s actually reality.
Most people think you need expensive tools like Hootsuite or Sprout Social to schedule Reels and Carousels. That is a myth.
In 2026, creators and small businesses can achieve Workflow automation and Direct publishing without spending a dime. You don’t need to be a developer either. This guide will show you a No-code automation method that is 100% free, using a combination of Buffer (for scheduling) and n8n (for connecting the dots).
By the end of this article, you will have a Content batching system that saves you hours every week. Let’s dive into the Zero cost tools that actually work.
Table of content
Table of Contents
Can I Automate Instagram Posts for Free? (The Short Answer)
Yes. However, you need to understand a critical rule: Instagram does not allow third-party apps to post Reels or Carousels automatically without going through their official API (Application Programming Interface).
But there is a workaround.
- The Native Way: Use Meta Business Suite. It’s free and safe, but the interface is slow and clunky.
- The Smart Way (We will use this): Use Buffer (free plan) + n8n (self-hosted free). This allows for true automation.
This tutorial focuses on the Smart Way because it connects to the Instagram Graph API directly, ensuring high Reach optimization.
Is Instagram automation safe?
Yes, if you use official APIs (like Meta Graph API or Buffer). It is unsafe only if you use “bots” that ask for your password directly to perform fake actions (liking, following). The method here is 100% compliant with Meta’s terms.
Why This Combo? (Buffer + n8n)
You might be asking, “Why not just use the free Meta planner?”
| Feature | Meta Business Suite (Free) | Buffer (Free) + n8n (Free) |
| Visual Content Calendar | ✅ Yes | ✅ Yes (Buffer Calendar) |
| Schedule Carousels | ✅ Yes | ✅ Yes |
| Schedule Reels | ✅ Yes | ✅ Yes |
| Hashtag Management | ❌ Painful | ✅ Saved Groups |
| First Comment Posting | ❌ No | ✅ Yes (Helps avoid caption clutter) |
| Bulk Upload (CSV) | ❌ No | ✅ Yes (via n8n) |
Buffer offers a beautiful Content calendar and a generous free tier (3 channels, 10 scheduled posts per channel). n8n is an open-source workflow tool that acts as your personal robot to talk to the Buffer API.
Step-by-Step Guide: Setting up Your Free Auto-Poster
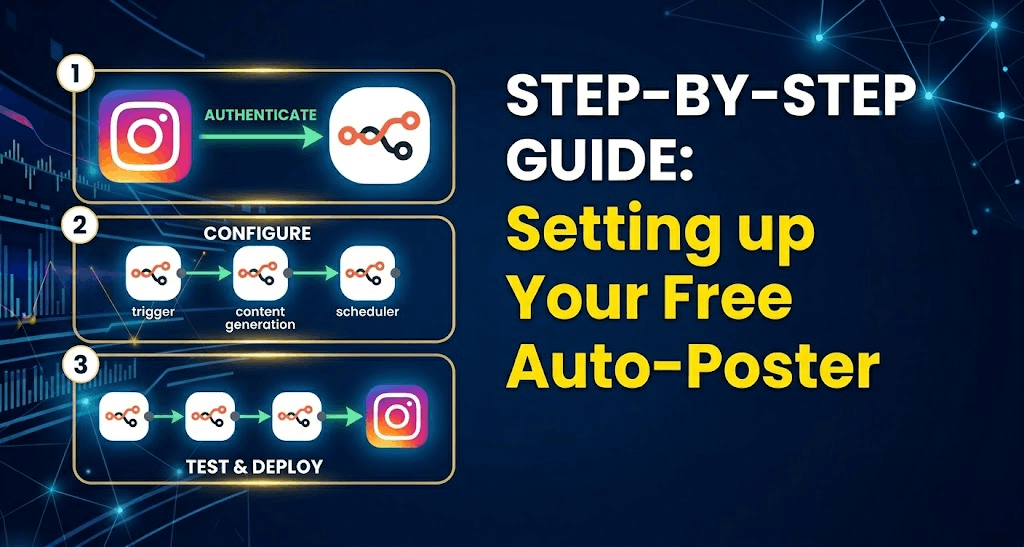
We will focus on using Buffer because it acts as a middleman. You don’t need to apply for Meta Developer Access (which takes weeks).
Phase 1: The Setup (15 Minutes)
1. Create a Buffer Account
- Go to Buffer.com and sign up for the Free plan.
- Connect your Instagram Business or Creator account. (Note: Personal accounts cannot use API scheduling).
2. Get your Buffer Access Token (The Key)
- This is the most technical step, but it is easy if you follow exactly.
- Click on your Avatar -> Settings -> Apps & Extras -> Scroll to Access Token.
- Click “Create Token” and copy that long string of letters/numbers. Keep this tab open.
3. Find your Instagram Channel ID
- We need to tell the robot which Instagram account to post to.
- Go to your Buffer Dashboard. Look at the URL when you click on your Instagram profile. It will look like: https://buffer.com/calendar/…/profile/**ChannelID12345**
- Copy that ID.
Phase 2: The “No-Code” Automation (Using n8n)
You could manually log into Buffer every day, but we want Auto-publish. We will use n8n to watch a Google Sheet (or Airtable) and send posts to Buffer.
If you don’t want to use n8n: You can stop here and just use the Buffer Queue feature. Just hit “Add to Queue” and Buffer will auto-post for you at the best times. That is 80% automation already!
If you want “Bulk Upload” (Pro Level):
- Create a Google Sheet with columns: Content, Image URL, Date, Time.
- Set up n8n (You can use the free desktop app or their cloud trial).
- Create a Workflow:
- Trigger: Google Sheets – “Get Rows” (only new ones).
- Action: Buffer – “Create Post”.
- Mapping: Map your spreadsheet columns to the Buffer API fields.
Result: Every time you add a row to your spreadsheet, the post is automatically scheduled to Instagram. This is Content batching at its finest.
The Secret Weapon: Automating Instagram Reels for Free
Scheduling a standard photo is easy. How to schedule Instagram Reels automatically? This is trickier because Reels have video requirements.
Using the Buffer GraphQL API (the language the app uses), you can schedule Reels if you have a public URL for your video.
The Formula for Success (Reels):
- Upload your video to a temporary host (like Dropbox or a public Google Drive link).
- In your automation tool (n8n or Make), call the Buffer API with this payload:
json
{
“input”: {
“channelIds”: [“YOUR_INSTAGRAM_CHANNEL_ID”],
“text”: “Your awesome caption here \n#HashTags”,
“mode”: “customScheduled”,
“dueAt”: “2026-04-05T12:00:00.000Z”,
“assets”: {
“videos”: [{ “url”: “PUBLIC_VIDEO_URL_HERE” }]
},
“metadata”: {
“instagram”: {
“type”: “reel”,
“shouldShareToFeed”: true
}
}
}
}
Pro Tip: Make sure your video is in MP4 format, H.264 codec, and under 100MB. The API usually takes about 5-10 minutes to process the video before publishing.
The “Free” Traffic Jam (What to Watch Out For)
While these Free Instagram tools are amazing, they have limitations you need to know to avoid frustration:
1. The “Custom Schedule” vs. “CustomScheduled” Bug
Many users fail because the API is strict. If you write customSchedule (missing the ‘d’), the API will reject your post. It must be customScheduled.
2. The 10-Post Limit
Buffer’s free plan limits you to 10 scheduled posts per Instagram channel. To get around this:
- Schedule posts for the next 10 days.
- On day 10, log in for 5 minutes, delete the old posts from the queue, and add 10 new ones. This is called “Micro-batching.”
3. Image URL Lifespan
If you are using automation, the link to your image must be valid forever. If you use a temporary file host (like tmpfiles.org), the image expires after 24 hours, and your Instagram post will break. Use Google Drive or a static CDN for long-term links.
The Ultimate Workflow: A Summary Table
Here is a cheat sheet for your team to Save time immediately.
| Task | The Free Tool | Time Saved |
| Writing Captions | ChatGPT or Grammarly AI | 5 mins/post |
| Designing Graphics | Canva (Free Templates) | 10 mins/post |
| Scheduling Feed | Buffer (Queue) | 3 mins/post |
| Scheduling Stories | Meta Business Suite App | 1 min/story |
| Bulk Uploading | n8n + Google Sheets | 1 hour/week |
Conclusion: Start Your Zero-Cost Automation Today
You don’t need a big budget to look like a big brand. By combining Buffer for the Visual scheduler and n8n for Workflow automation, you can achieve 90% automation for your Instagram account for exactly $0.
Your Action Plan for Tomorrow:
- Sign up for Buffer Free.
- Connect your Instagram Business account.
- Schedule your next 5 posts using the “Queue” feature.
- (Optional) Set up a Google Sheet to try Bulk upload.
Stop letting social media control your time. Start batching, scheduling, and automating.
Frequently Asked Questions (FAQ)
Q: Can I automate Instagram posts for free without using Meta Business Suite?
A: Yes. Buffer offers a free plan that allows you to schedule via their interface. For fully automated bulk uploads, you combine Buffer with free automation tools like n8n.
Q: Is Instagram automation safe for my account?
A: Yes, when using official tools like Buffer, Later, or Meta Business Suite. These use the official Instagram Graph API. Never give your password to random “auto liker” websites.
Q: How to schedule Instagram Reels automatically?
A: Use Buffer. When creating a post via their API or web interface, select “Reel” as the content type and provide a direct link to your MP4 video file. The free plan supports this.
Q: What happens if my image link breaks?
A: Instagram will reject the post. Always use permanent storage (like Google Drive “Shared” links or your own website hosting) for images used in automated scheduling to ensure Direct publishing success.
read this Article About “How to Become a TikTok Shop Affiliate Without Followers (Zero to Hero Guide 2026)“